A PHP Error was encountered
Severity: Notice
Message: Undefined property: stdClass::$memberName
Filename: layout/layout_content.php
Line Number: 237
A PHP Error was encountered
Severity: Notice
Message: Undefined property: stdClass::$memberName
Filename: layout/layout_content.php
Line Number: 237
AAI
Atlantoaxial instability guide
Basic configuration
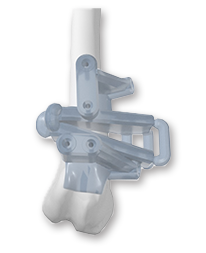
Osteotomy guide 2EA
Osteotomy guide
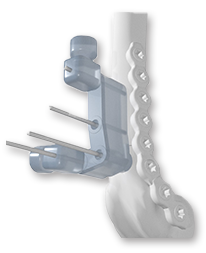
1 conquest guide and 2 guide fixing devices
Osteotomy guide & Guide stopper
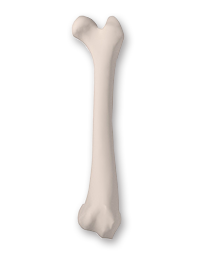
Mock surgical bone model
Bone model for rehearsal surgery
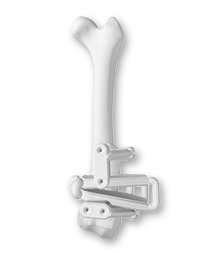
Pre-op bone and osteotomy guide combined model
Pre-op bone model with osteotomy guide
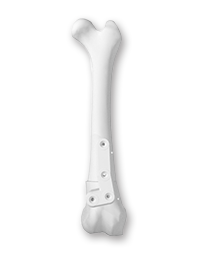
Bone and reduction guide combined model after surgery
Post-op bone model with reduction guide
Form and function
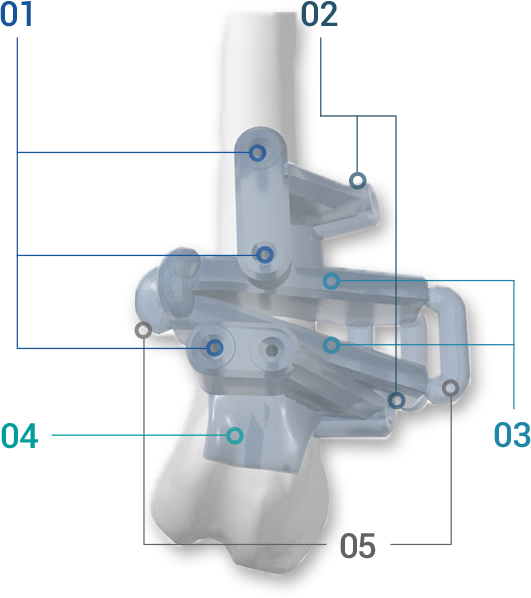
Osteotomy guide Osteotomy Guide
01 Mounting pin drill guide Install pin drill guide
- Guide for mounting pins to temporarily fix the guide and bone.
- It is located within the coverage area of ??the plate after surgery to prevent fracture after surgery.
- Designed to fit the minimum pin size that allows bone manipulation after osteotomy.
02 Sub pin drill guide Sub pin drill guide
- This is a guide for inserting an auxiliary pin to prevent the guide from being separated.
- The osteotomy plate can be designed to match the position where the temporary fixing pin is inserted.
- Generally, it is designed based on the thickness of the pin for temporarily fixing the plate.
03 Osteotomy block Osteotmy block
- It is designed as Open type or Slot type depending on the equipment in the hospital.
- There is a bridge between the cutting blocks, so they are separated after the guide is installed.
04 Bracket Braket
- Designed to fit the bone surface for the correct mounting position of the guide.
- If it has more than a certain thickness for surgery
05 Bridge Bridge
- It is used for parts that need to be separated during the surgical procedure.
- No need to cut with a surgical saw, it can be removed simply with a longzer.
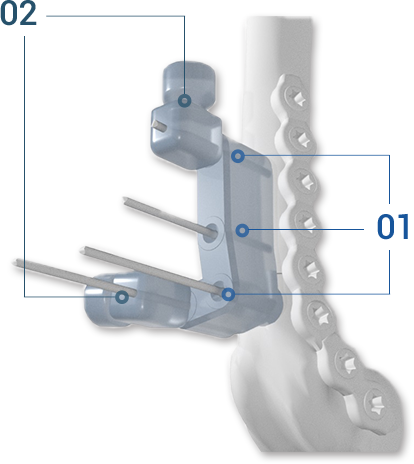
Conquest guide and guide fixture
01 Mounting pin guide Install pin guide
- Holds mounting pins to rearrange bones after osteotomy
- After conquest, the plate is designed in a position free from interference in the process of mounting.
02 Guide holder Guide holder
- After osteotomy, used with conquest guide.
- It is designed based on the thickness of the mounting pin, and can be applied simply by turning the screw.
- It secures the bone completely by fixing it to the mounting pin on the conquest guide.
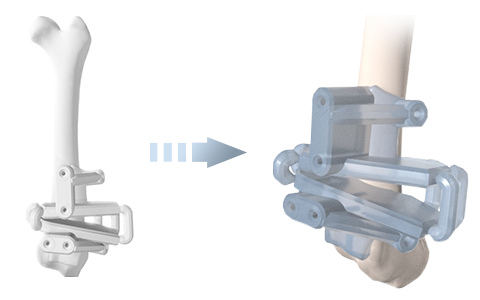
Step 1
- The osteotomy guide is attached to the bone.
(Refer to the provided pre-surgical bone model for mounting location) - Make sure that the surface of the guide is in close contact with the bone in all areas to ensure that the guide is mounted correctly.
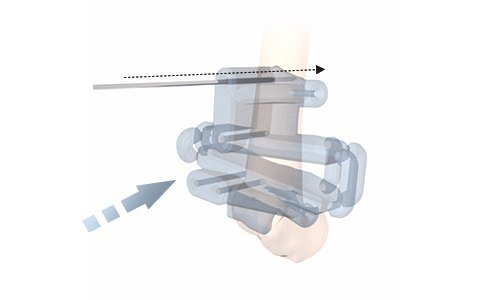
Step 2
- While pressing the osteotomy guide toward the bone, insert the mounting pin (K-wire) through the mounting pin drill guide.
- Mounting pins are inserted through both cortex of the bone.
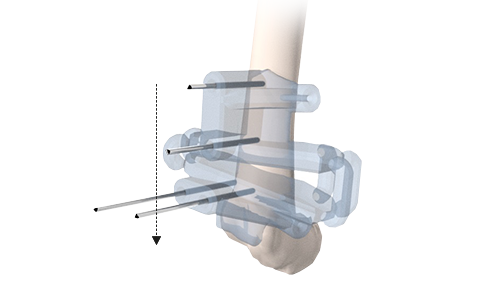
Step 3
- Install all mounting pins in order from proximal.
- The position of cutting the pin is 10mm for the proximal side of the bone from the entrance of the drill guide, and then, increase the length in order in the distal direction.
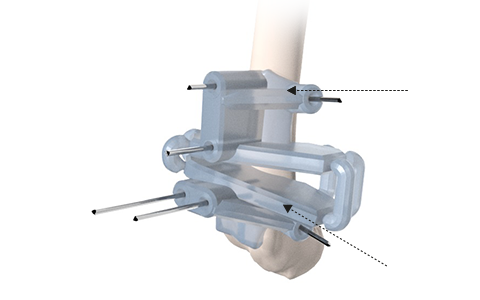
Step 4
After inserting all the mounting pins, insert the auxiliary pins. The auxiliary pin is inserted so as to penetrate only one cortex of the bone, but in some cases, it can penetrate both cortex.
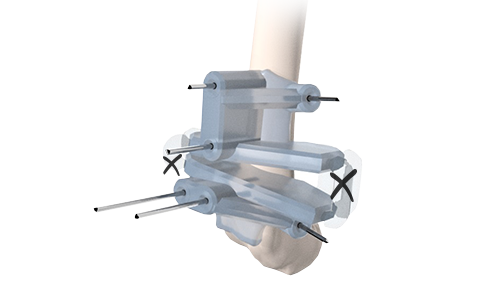
Step 5
After inserting all the mounting pins, insert the auxiliary pins. The auxiliary pin is inserted so as to penetrate only one cortex of the bone, but in some cases, it can penetrate both cortex.
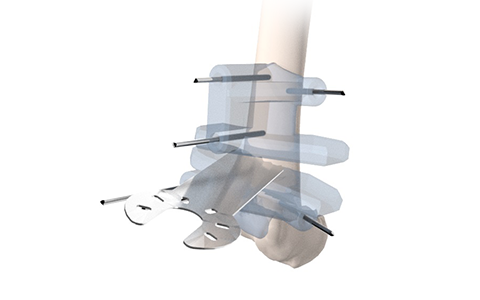
Step 6
The surgical saw is accurately attached to the cutting block, and the osteotomy is performed from the distal position.
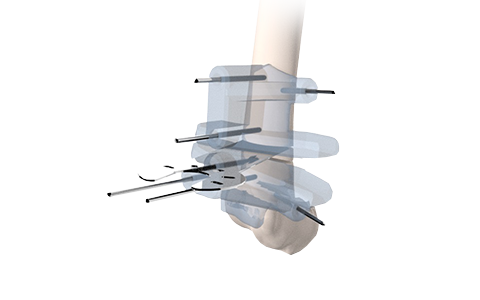
Step 7
- Cut the proximal part.
- The order of osteotomy is generally in the order of distal → proximal, but the order can be changed according to convenience during surgery.
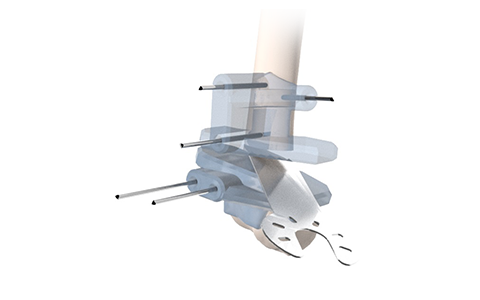
Step 8
- Even if the bones are not cut accurately at once, the cutting surface can be formed using the cutting block as a guide.
- However, at this point the surgical saw must be made exactly parallel to the osteotomy block.
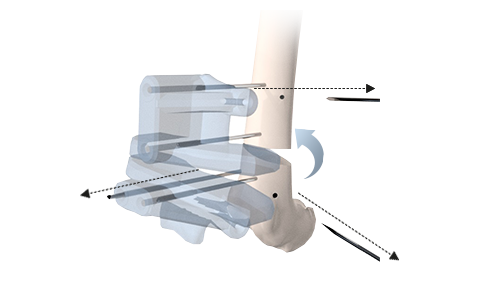
Step 9
When the osteotomy is finished, remove the multipurpose pin, remove all the cutting guides, and rearrange the bones.
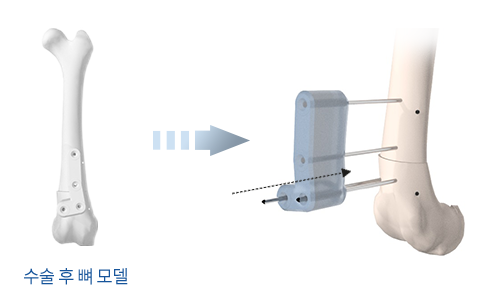
Step 10
- Mount the conquest guide through the mounting pin.
(Refer to the provided post-surgery bone model for mounting orientation) - It is easy to connect the mounting pins to the conquest guide one after the other.
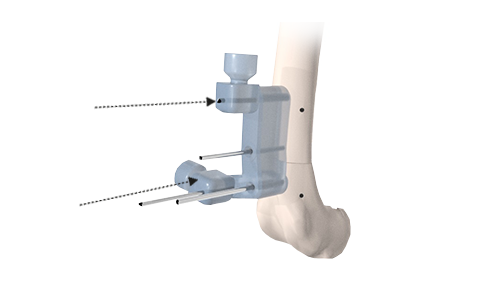
Step 11
After the conquest guide has been sufficiently pressed, a guide fixture is installed to prevent the bone from moving any further.
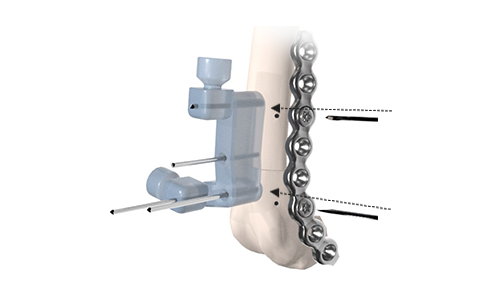
Step 12
- Temporarily fix the plate using the position where the multipurpose pin was inserted.
- There may be some errors depending on the deformation of the plate, so if it is difficult to mount, hold the plate position with only one pin.
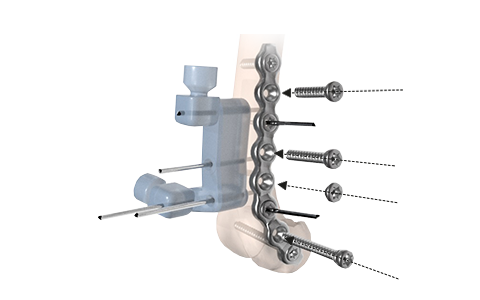
Step 13
- Fix the screw to the plate..
- Fix the most proximal and distal screws, and later fix the screw close to the osteotomy line.
- Plugs may be inserted according to the surgical plan.
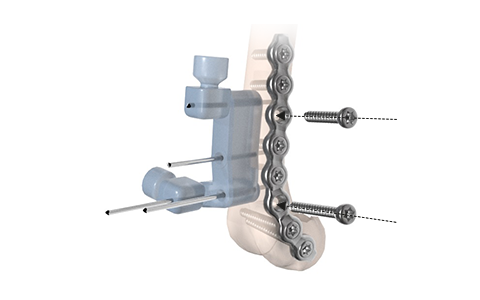
Step 14
- Remove the plug and pin for temporary fixing and fix it with screws.
- If the position where the auxiliary pin was used and the screw direction do not match exactly, a drill bit should be used based on the plate.
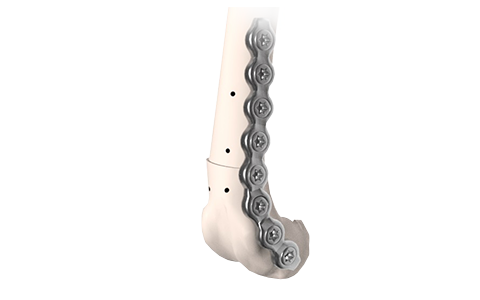
Step 15
The operation was completed
Hours of Business
9 am to 6 pm on weekdays(from 12pm to 13pm)We are closed on Saturday, Sunday, and holiday.
Customer Service
- MutualCustoMedi
- FAX+82-050-4084-0627
- RepresentativeCho Sung Woon
- TEL+82-070-8823-8276
- E-mailcustomedics@gmail.com
- Address34047, Yuseong-gu, Daejeon, Route 1689 70
Copyright © CUSTOMEDI. All Rights Reserved.

 Login
Login


